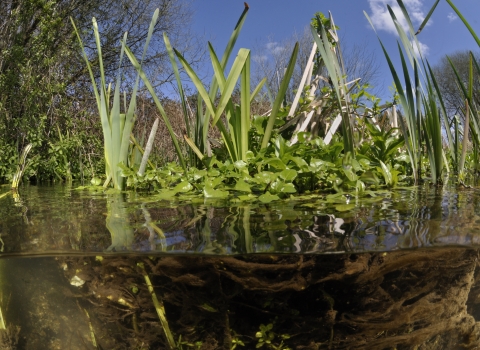
Pond dipping isn't just for children, there's a fascinating world just waiting to be discovered...
In the spring 2019 issue of Local Wildlife we showed you some of the wildlife you can find underwater. Get even closer to the underwater world by building a bathyscope or underwater periscope with these how-to guides.
Stay safe!
These gadgets are best used in small ponds or shallow streams. Make sure that you can lean over safely from firm ground. Keep a firm hold of your gadget and don't fall in!
Construct a bathyscope
The most simple device to construct to look underwater, you can build a bathyscope almost entirely out of found materials. Use it to look into shallow bits of water with easy access and cut out the surface glare.
What you'll need:
- A plastic tub/bottle/pipe - the taller this bit is, the further away from the water your face will be when you're viewing the underwater world - and the wider the base, the more you'll see in one go. A traffic cone shape is ideal; a bottle will work well too.
- Clear plastic bag or sheet - you could reuse a produce bag or packaging. The thicker it is, the more durable it will be.
- A rubber band
- Duct tape
How to make a bathyscope:
- Cut both ends of your chosen tub or bottle to make the main body of the bathyscope. If you've got a pipe, then both ends will already be open. If you've chosen a tub or bottle, you will need to remove the bottom. Make sure the end you will use to view has no sharp edges as it will be close to your face.
- Stretch the clear plastic over the end of the bathyscope and secure in place with the rubber band. Make sure it's stretched tight so that you can see through it clearly.
- Fix the plastic in place with the duct tape to protect it from splashes and hold it securely.
- Go looking for underwater wildlife by lowering the end with the plastic into the water, and viewing from the top. Try not to lower it too far and keep the duct tape out of the water.
- Make sure you stay safe - don't lean over the edge too far and make sure where you're sitting or standing is firm ground.
Construct an underwater periscope
A slightly more complicated construction, a periscope will allow you to see (or photograph) underwater at a 90° angle, as if you were snorkelling - whilst staying dry!
What you'll need:
- A length of downpipe, any diameter, round or square. The longer this section of pipe, the deeper your periscope will go. If you are planning to use it with a camera, make sure the lens will fit down the pipe for ease of use. You can buy this from a DIY shop or use offcuts from other projects.
- A 90° corner section of downpipe to fit.
- A small mirror that will fit into the pipe, Check your local craft shop, or perhaps a charity shop for an old make-up mirror, and make sure you measure it to fit.
- A sheet of glass or plexiglass to cover one end of the pipe. You could buy a small picture frame and remove the glass - but be careful of any sharp edges.
- Waterproof sealant, preferably clear, that works on glass and plastic. Note: you must use aquarium sealant if you are planning to submerge anything permanently as silicone can be damaging for wildlife.
- Putty or blu-tak.
How to make an underwater periscope:
-
Fix your length of pipe and the corner section together. Seal the join with the sealant to make sure it's watertight
-
Take your mirror and, using putty or blu-tak on two edges, fix it into the corner of the inside of the pipe at a 45° angle. Look down one end of the pipe and make sure you can see through the other end when you look at the mirror, and adjust if necessary. Once you've got the positioning right, fix the mirror in place using glue or sealant so it doesn't move around.
-
Use the sealant to fix your sheet of glass or plexiglass over the short end of the pipe. This is the end that will go into the water, so make sure it is fixed in place and watertight.
-
Wait for the sealant to dry, and then take your periscope to test it out with water!


